
Rubicon Trail reopens!
Posted: March 21, 2014 Filed under: Access, Maintenance | Tags: El Dorado County, FOTR, Rubicon Leave a commentEl Dorado County has reopened the Rubicon Trail.
FOTR will work the problem section this summer to prevent future closures.
Unless there is a heavy rain storm, the trail should remain open.
Trail Conditions…
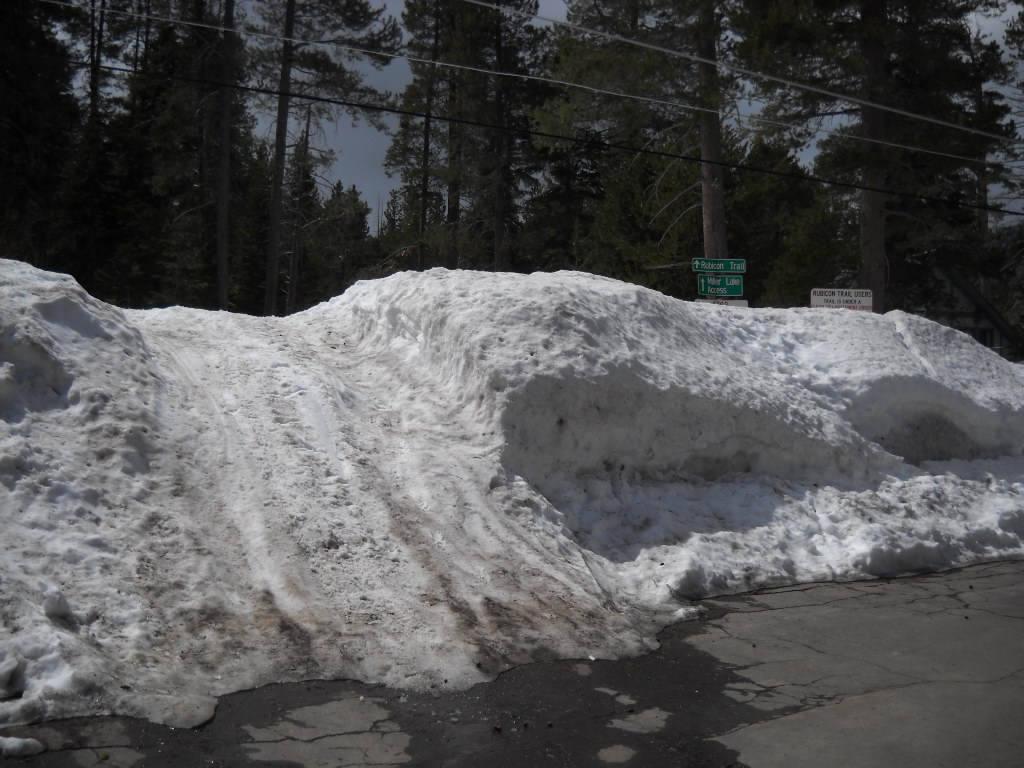
Posted: March 18, 2014 Filed under: Access | Tags: Rubicon Leave a commentI was at the lake yesterday and stopped by the Rubicon. See the photo of the week.
The paved section had snow but also two ruts down to the pavement all the way to the staging area. My 31″ tires had no problem getting me to the staging area but the trail past there was a different story. I tried to drive up the trail and the ruts became deeper. A few of the “potholes” in the ruts caused my front end to bottom out.
I turned around before the first climb but that climb was icy and very slippery. I can only assume there are patches of snow and dirt further up the trail. There have been reports that Cadillac Hill is dry and that there are some snow berms along the trail.
This time of year the trail is fragile. Please do not drive off trail to get around the snow berms or water holes. These actions will damage the forest and give ammunition to the anti-OHV crowd to use against us to close our trails.
Turn around, don’t go around!
FOTR Annual Meeting
Posted: March 15, 2014 Filed under: Maintenance | Tags: El Dorado County, Placer, Rubicon Leave a commentFOTR’s annual meeting will be held Saturday, May 3rd.
Posted on Pirate4x4.com by the Trail Boss, Jerry Reffner:
FOTR Annual Meeting
Its that time again, so we now have a date and place:
Saturday-May 3rd
Start Time: 9am
Place: Placerville Maintenance/Operations/ Construction, DOT Building
2441 Headington Road Placerville 95667The Annual meeting this year will be in Placerville. We are going to incorporate the Adopt-A-Trail training into this year’s meeting. This will also serve as a meet and greet as we will have a lot of new faces.
The plan is to have at least 2 to 3 representatives from each club/organization to go over trail work, the how’s and why’s and the paperwork.
El Dorado County will have their people there to show how to do specific projects and walk them through all the aspects of getting the program up and running.
All members of FOTR should go through this process also, the reason being so everyone will have the same training and in the advent of a club having to drop out FOTR volunteers can step in seamlessly.
There will be the usual discussions on what projects FOTR will be involved with this year both El Dorado County and Placer County, and please bring your ideas of any projects that you see the need for. This is a start of a brand new year, with a brand new Adopt A Trail Program! It should be another record breaking year.
A continental breakfast will be provided before and RTF is going to supply the lunch.
As we get closer to the date, more info will be sent out. And please if you have any questions/ideas or want to have some speaking time, the floor is always open.
Contact for the Adopt-A-Trail is:
Vickie Sanders
Parks Manager
County of El Dorado
Chief Administrative Office
530-621-7538Thanks and look forward to seeing everyone there.
New RTF Trailer for the Tahoe side
Posted: February 22, 2014 Filed under: Maintenance | Tags: grant, RTF, Rubicon Leave a commentChristmas came late!
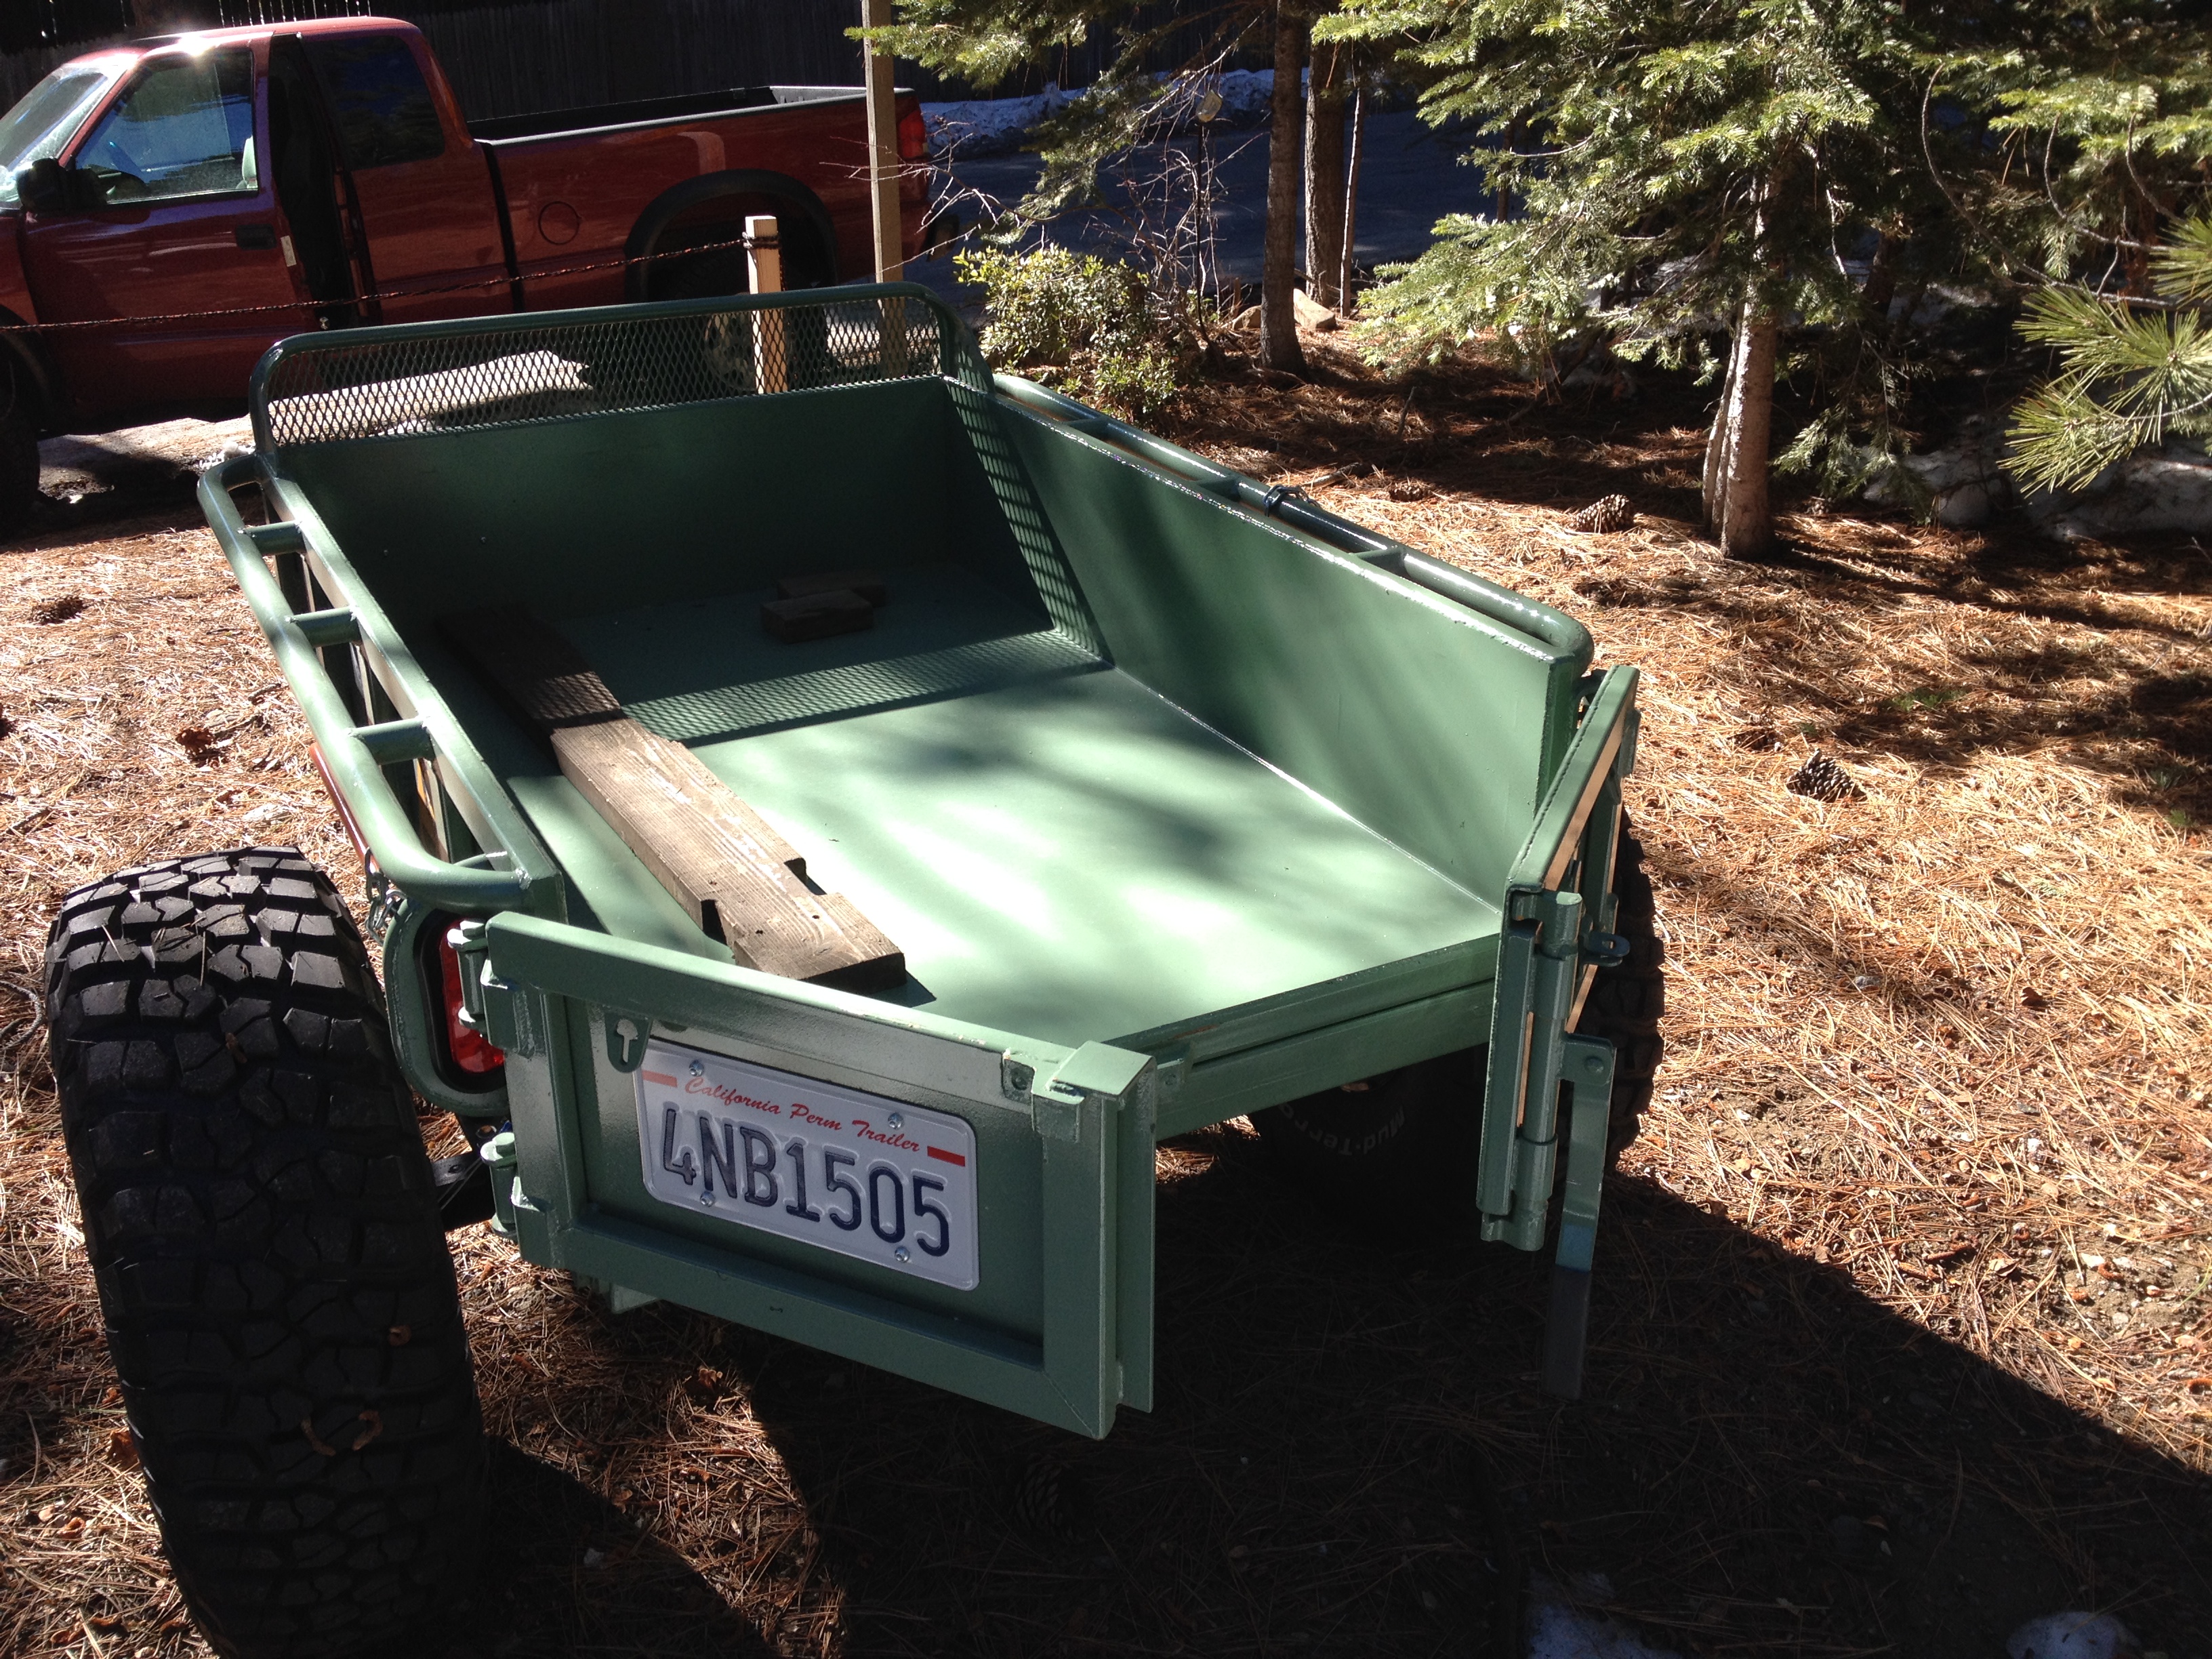
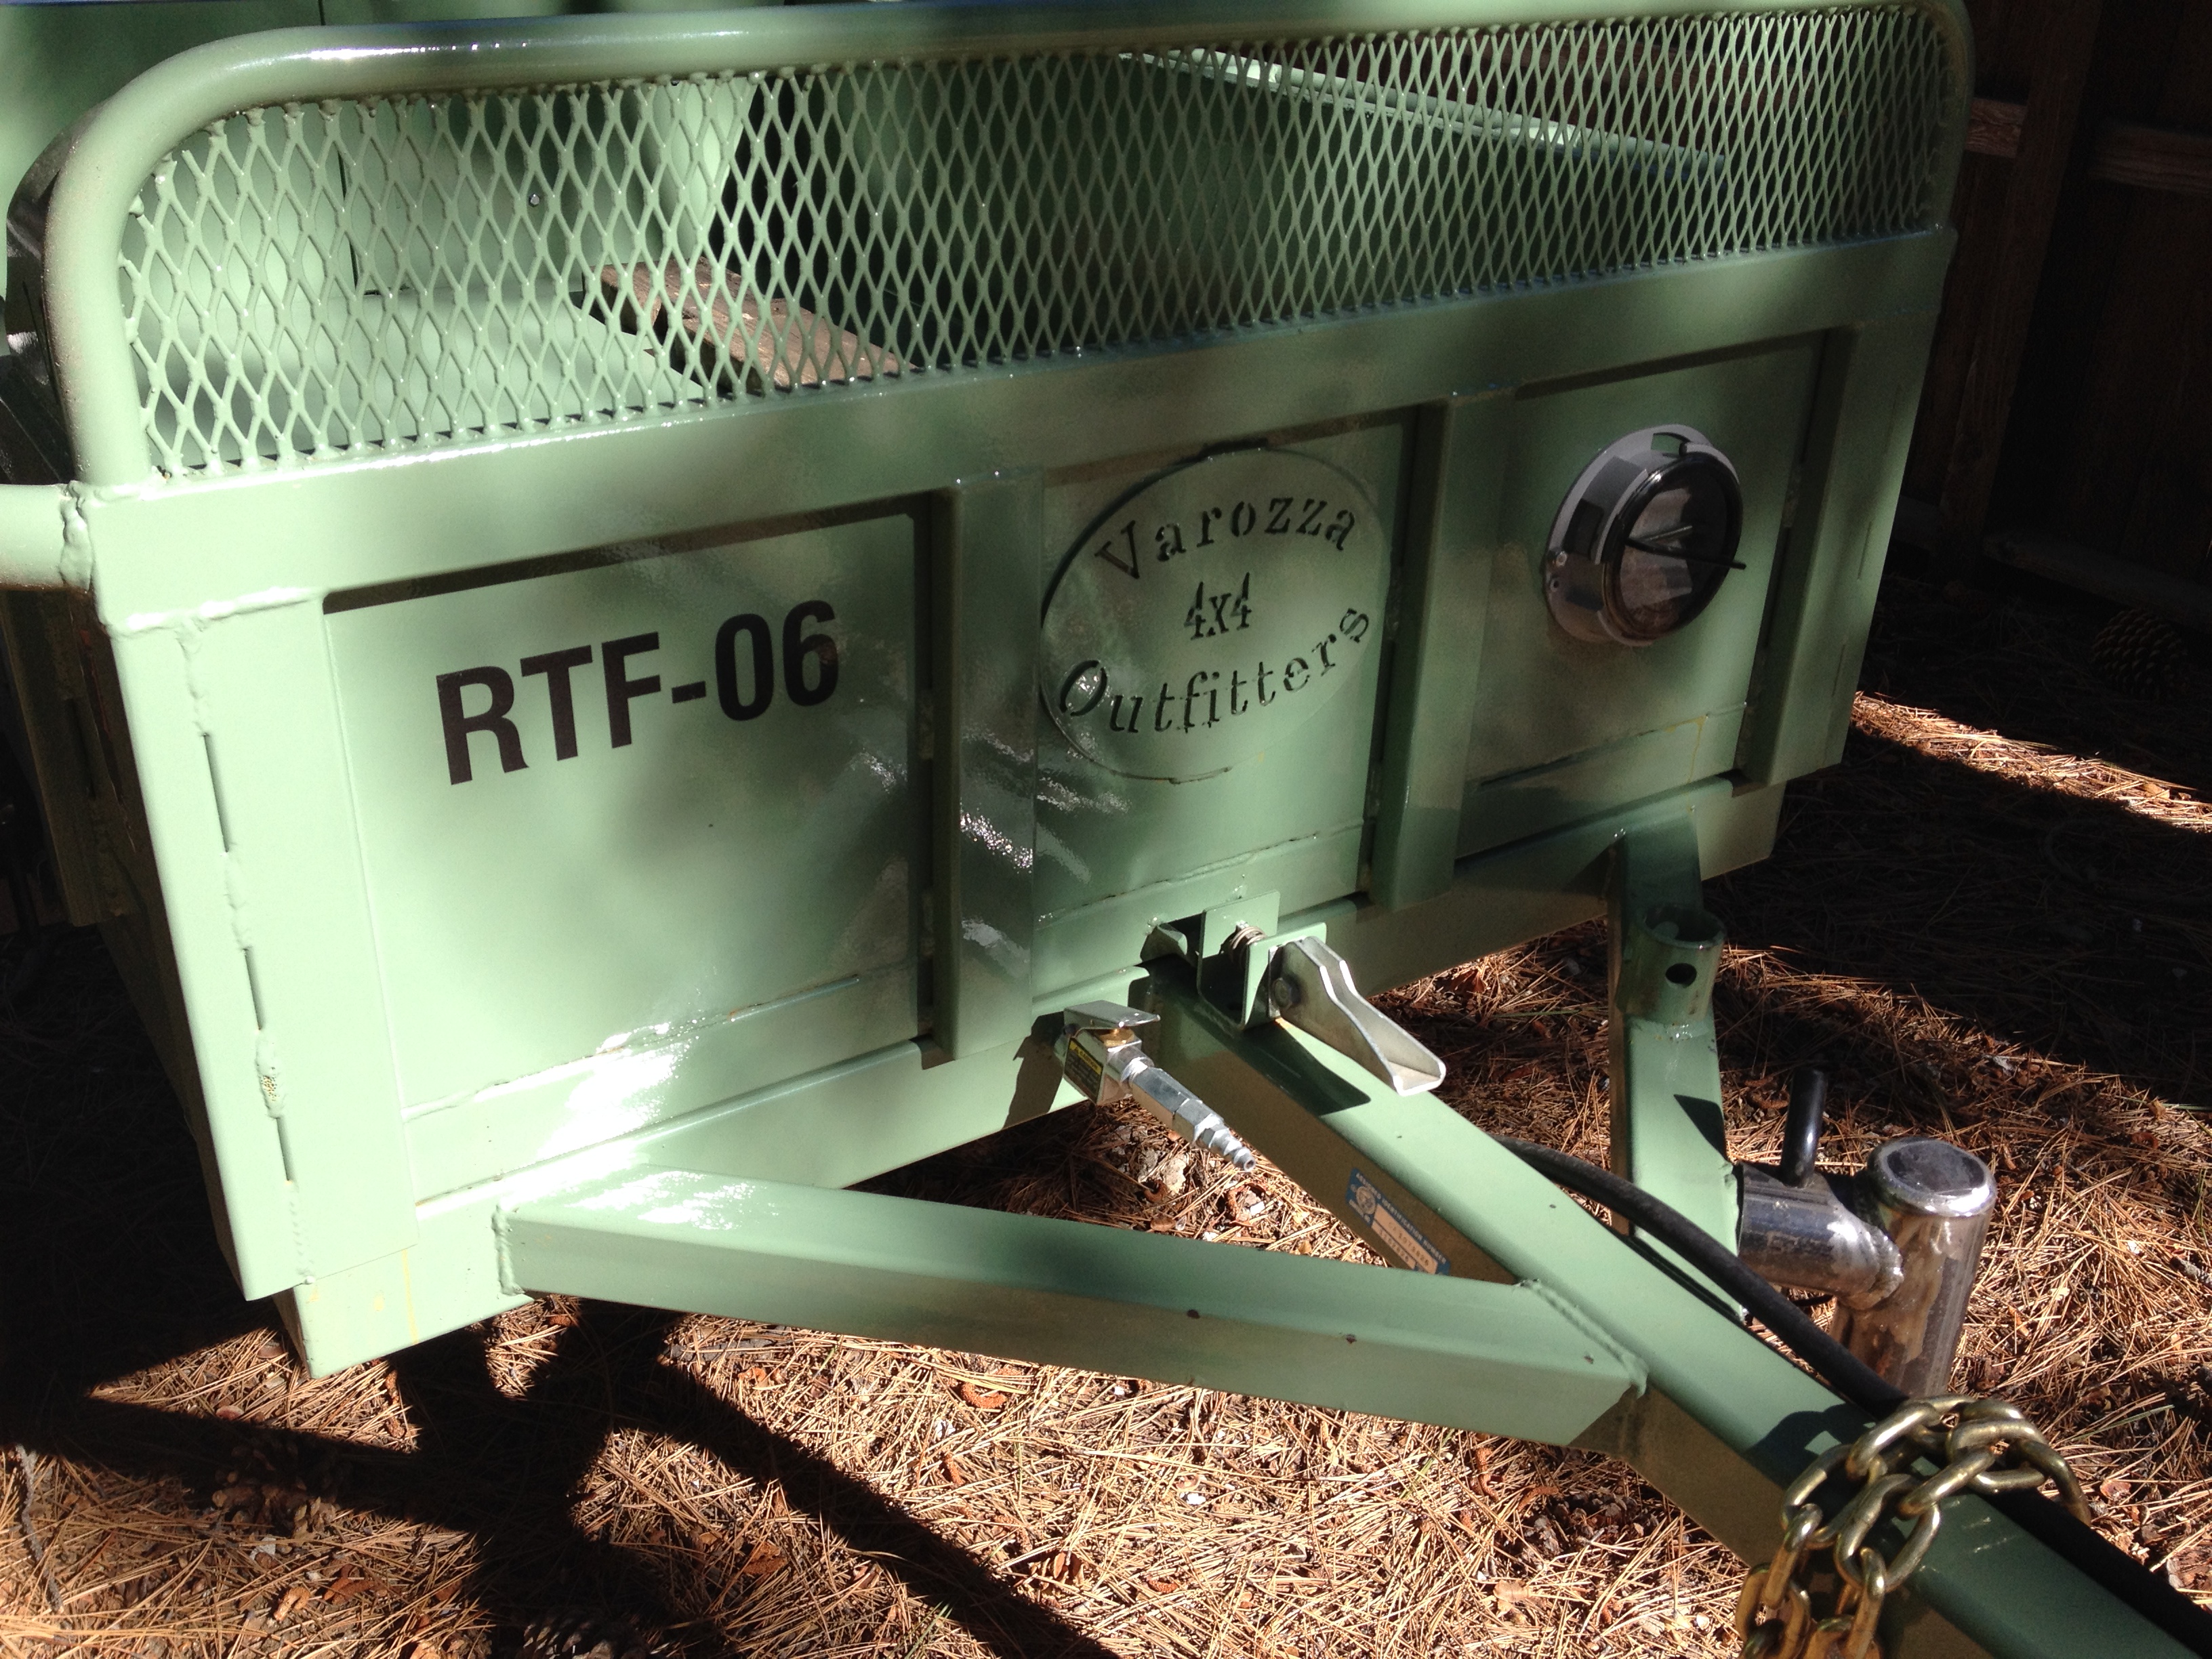
John Briggs, the Placer County liaison for FOTR, just received a brand new trailer for maintenance efforts on the Tahoe side. It belongs to RTF (Trailer RTF-06), obtained through OHMVR grant funding, and is on a “permanent loan” to the Tahoe side. If it is needed on the Eldorado side, we’ll bring it over.

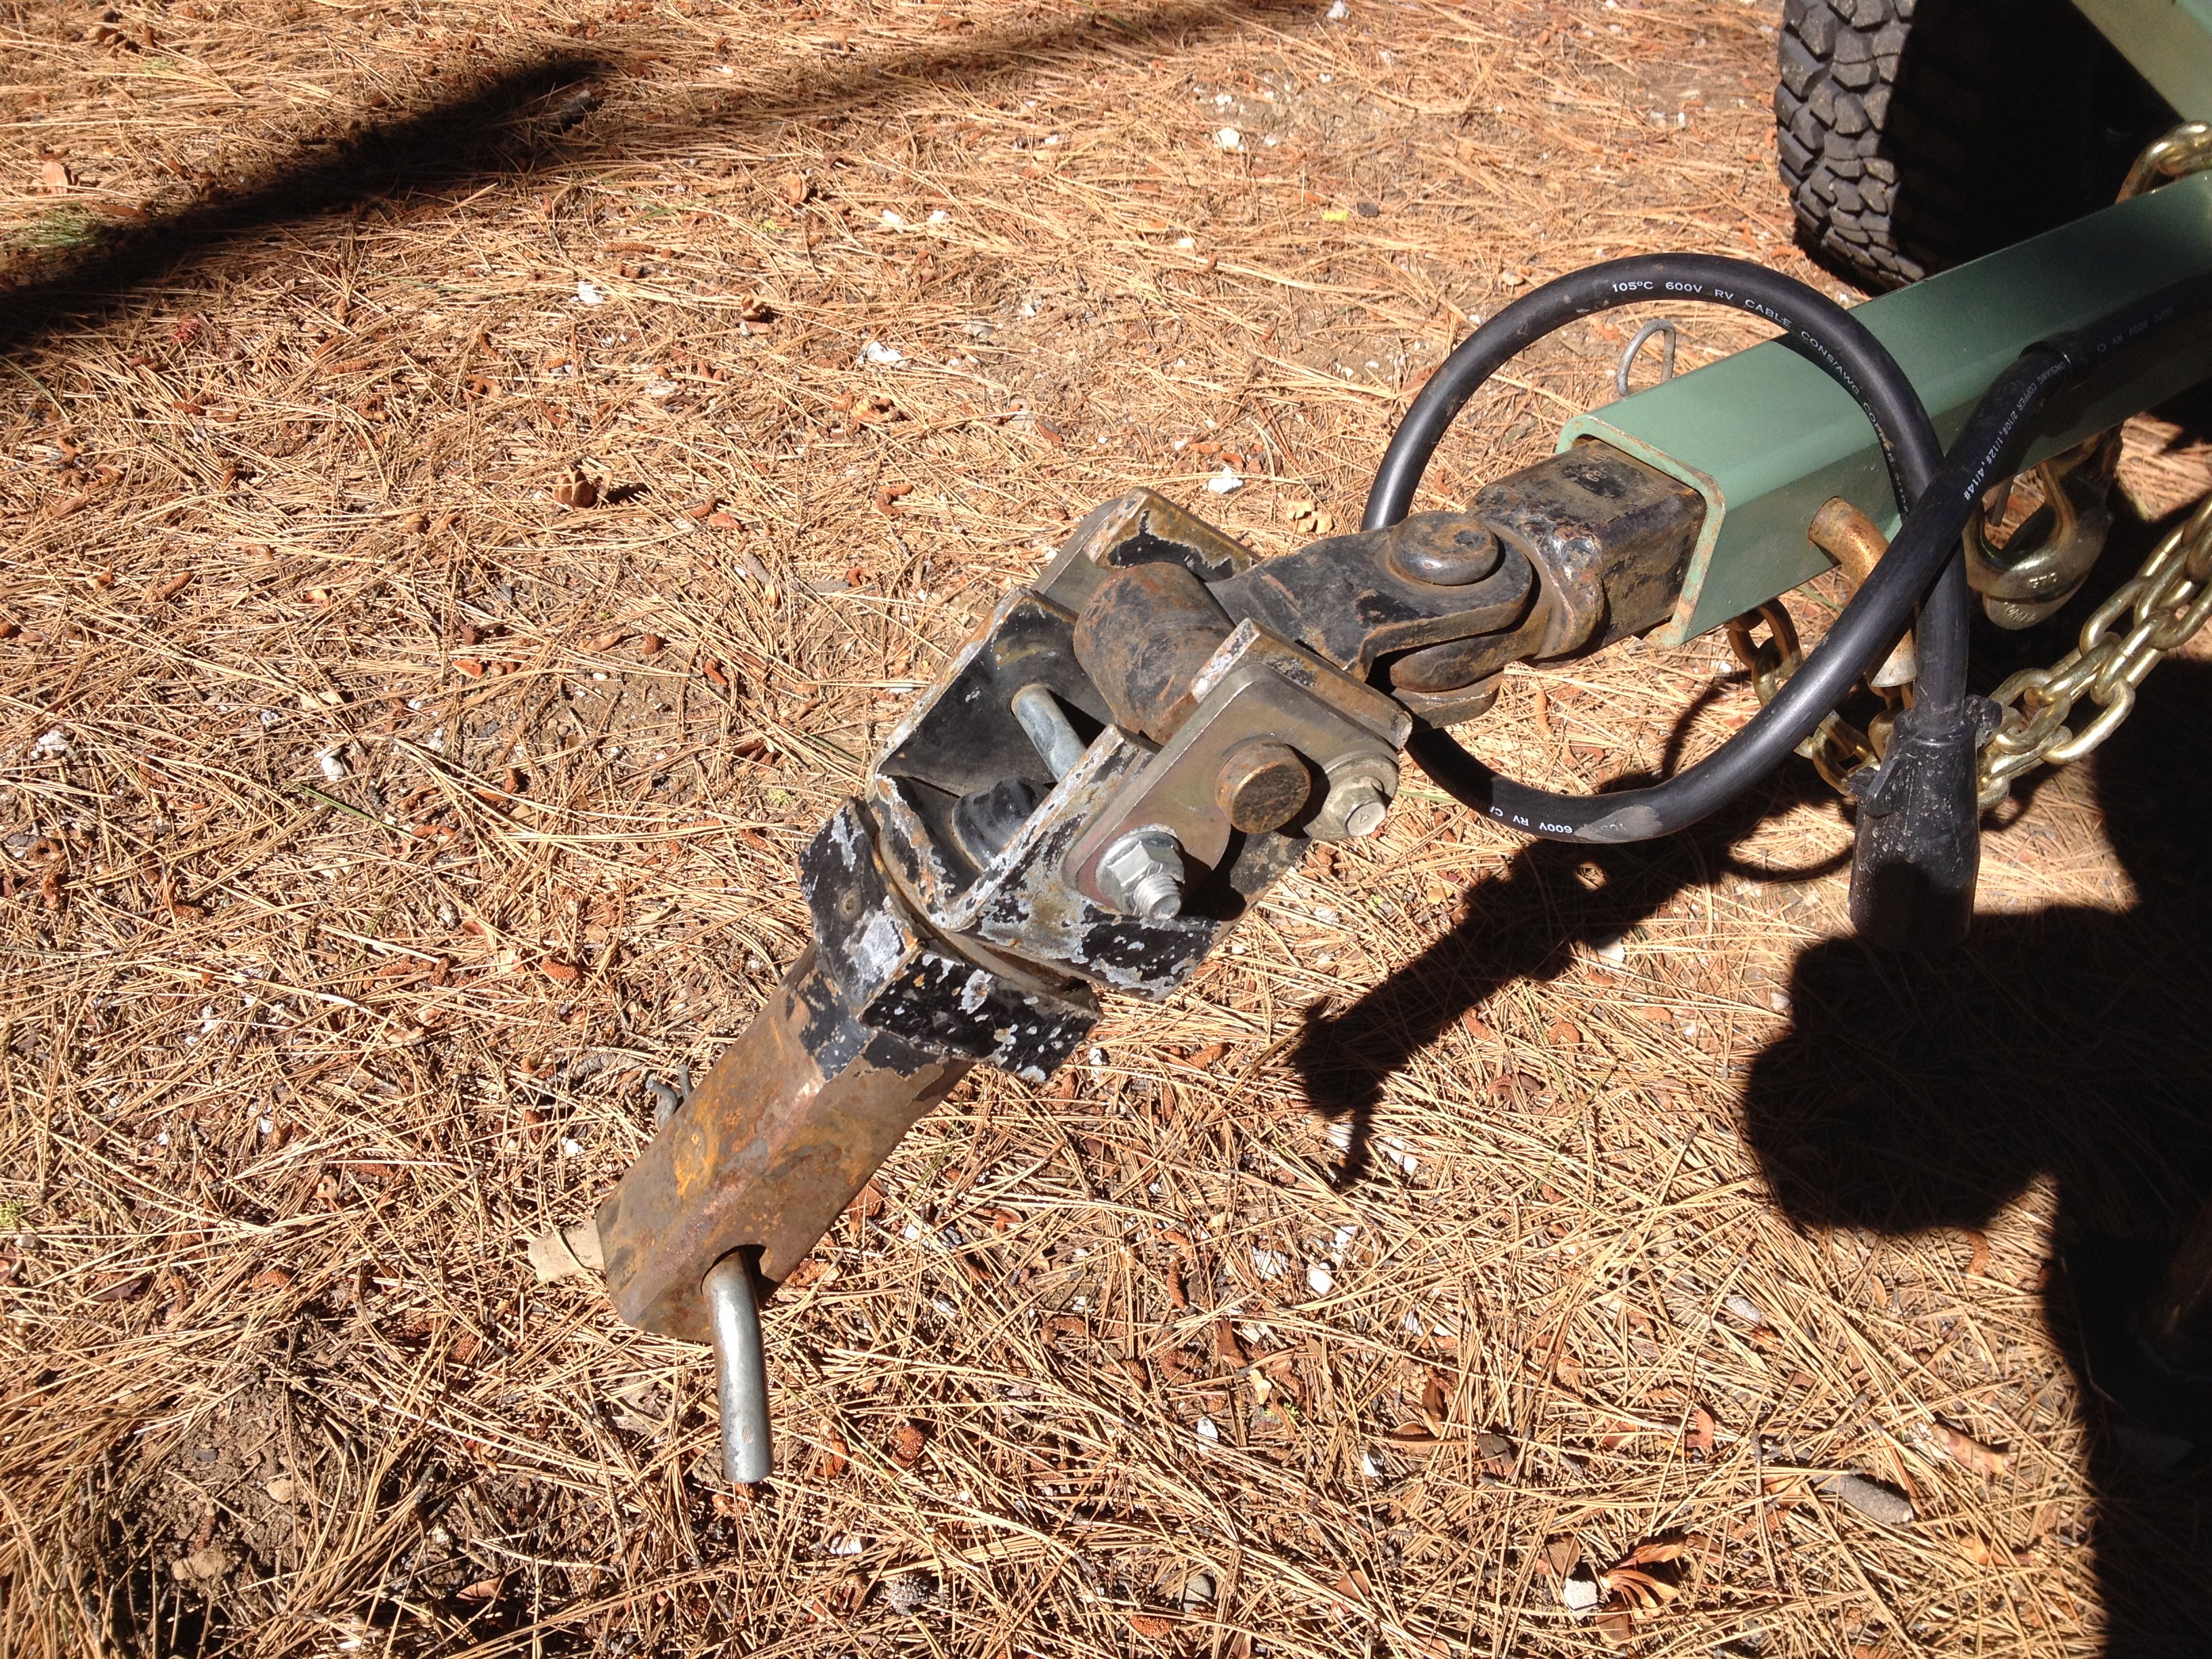
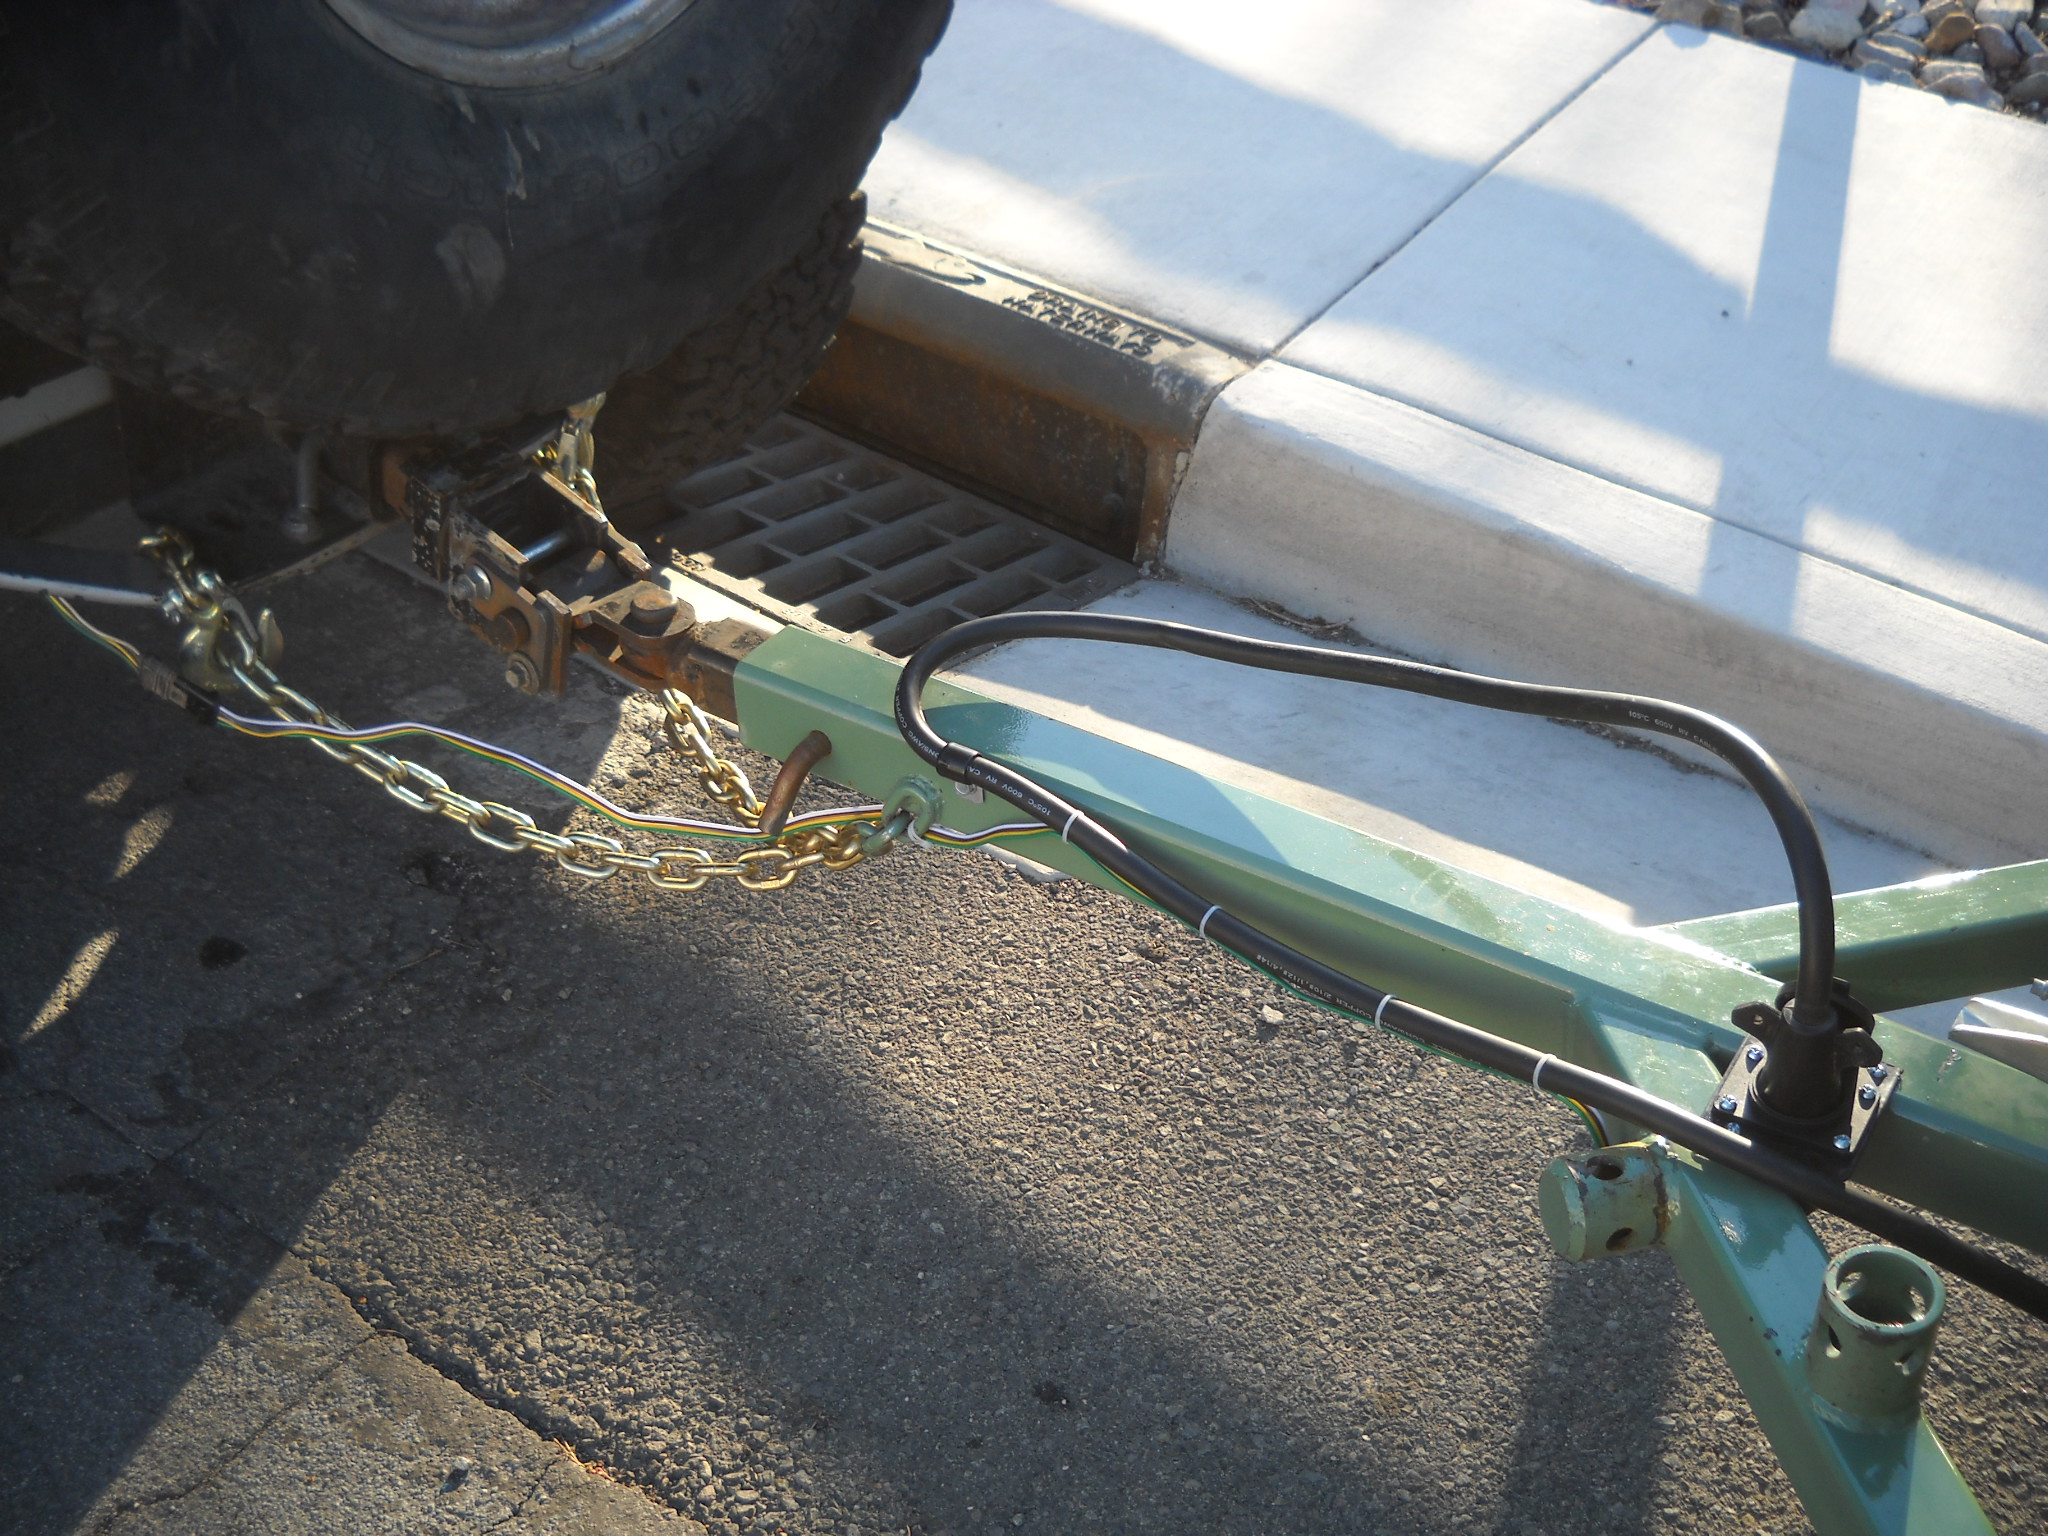
I got a chance to check it out today. It was made by Varozza 4×4 Outfitters (www.Varozza4x4.com) out of Diamond Springs, CA, just south of Placerville. The basics: 2/3 of a yard capacity with a built in dump feature (air/hydraulic); 360 degree “Lock N Roll” rotating hitch (all you need is a 2” receiver); two piece swing out tailgate all on 35” BFG Mud Terrain tires. Another feature is the offset axle. It is offset up about 4” between the leaf springs in order to gain more clearance.

There is a standard air chuck intake like you would find on an air tool. There is a valve on the trailer to control the lifting of the trailer. Supply air and the bed tilts up, in order to lower the bed, you need to use the orange handle to turn the release on the hydraulic jack under the trailer. There is a latch to hold down the bed. In case you are out of air, there is a manual override by using the orange handle on the side of the trailer to pump the hydraulic jack under the trailer; quite awkward.
The trailer weight is low enough that it does not require fenders, nice! And the trailer paperwork is in a holder on the front of the trailer to prove that to any officer that tries to ticket you.
Specifications:
- Hitch height – 24″
- Bed dimensions – 60″ long, 40″ wide, 12″ deep (16 cu. ft./0.62 yards)
- Overall width – 70″
- Wheel pattern – Toyota 6 lug (I think)
- Weight – 1100 pounds (empty)
- Electric brakes – (needs 7 prong RV connector)
The trailer now has a mounted 7 to 4 adaptor. So, you can use the 7 prong connector (if you have one) to get the benefit of trailer brakes or plug the 7 prong in to the adaptor and use the flat four connector to get lights only.
Operation:
Before tilting the bed, open the dual tailgate doors and secure them with the small chains on the sides of the trailer. The trailer has a small square tube on each side to hold the chain to prevent it swinging and being noisy and chipping the paint.
To dump the trailer, you need to supply it with compressed air. Before opening the valve to supply air the trailer with air, unlatch the tilt bed from the trailer frame at the front of the trailer, if you don’t the bed won’t go up. (Trust me on this one.) The air to hydraulic pump surges, it sounds and feels like it’s giving the jack small bursts of air. Empty, the bed bounces and jerks a little bit. This operation uses quite a bit of air to operate.
There is a support brace under the trailer if you need to have the bed up for an extended period of time. Jack up the bed, reach under the bed and hold up the brace while you lower the bed on to the brace. This will provide a safer means of working on the trailer.
Speaking of working on the trailer, along with adding the electrical adaptor, I purchased and swapped out the air line from the valve to the pump. The original hose was not on all the way, so I reattached it. Then it blew, three times! I went and bought a steal braided reinforced 4000psi hydraulic line with threaded connectors on both ends. The hose will not leak or blow.
An example of how this will be used on the Tahoe side would be to finish the culvert removal project John Briggs headed up last summer. We still need to rock line the seasonal crossing to prevent any erosion and this will save some backaches, at least during unloading.
The trailer will be stored in a central location with a combination lock so arrangements can be made to let groups doing maintenance access it as needed. I’ve purchased a combination lock and John Briggs donated some chain. We’ll lock the trailer and provide the combination when someone needs it. The combination lock has a changeable combination so we’ll change the combination with each use.
This will be a huge help toward keeping the Rubicon Trail maintained and thus open for year ‘round motorized public use.
Thank you RTF for getting the grant and sending a trailer to the ‘Other’ Rubicon.
The Story of the Snow Gate
Posted: January 12, 2014 Filed under: Access, Travel | Tags: LTBMU, Placer, Rubicon Leave a comment Once upon a time, like 1999-2000, some very anti-OHV people tried to close the Rubicon Trail. They argued that Jeeps crossing seasonal creeks caused erosion and released sediment which found its way to Lake Tahoe. The only solution they saw was to close the trail.
In 2000, FOTR was formed. In 2001, 1800 cubic yards of crushed rock was placed at 28 newly built rolling dips at each seasonal creek crossing on the Rubicon Trail. This was not enough for the anti-OHV people. They argued that the rest of the trail was still wet and they wanted a gate to close the trail after the first rain of the fall that was to be opened only after the trail had completely dried out.
The private property owners said they would have to have a key to that gate and that after receiving that key they would make copies for their 10,000 closest friends. The county needed another solution.
A snow-gate was proposed. The snow removed from the neighborhood streets would be piled at the entrance to the Rubicon throughout the winter, thus creating a “snow” gate and preventing winter use of the Rubicon Trail. Come springtime, once the HUGE pile of snow had melted, the assumption was that the trail would be dry enough for wheeled use.
More than a dozen years later, equipment improvements have allowed wheelers to use the Rubicon year-round. The trail never officially closes. Wheeling over the snow is probably the most ecologically friendly type of wheeling as you’re leaving tracks on several feet of snow that once it melts, you’ll never know anyone was there.
Snow is still piled at the entrance but if you have a capable enough rig, you can legally drive over the ‘snow-gate’ and access the Rubicon Trail.
John Arenz, of RTF, has compiled a list of things to carry with you while winter wheeling:
- SIGNALLING PANEL, Ultra High Visibility, two color 24” x 69” heavy duty nylon (1)
- SLEEPING BAG, mummy style w/compression stuff sack (1 for each person)
- TENT, 6 person (1)
- SLEEPING PADS, insulated (1 for each person on board
- WATER PURIFICATION TABLETS, germicidal, (25 quart )
- HAM RADIO, dual band, w/ clamshell battery and spare AAA’s
- GPS, portable
- SNOW SHOES (1 pair for each person)
- COMPLETEOUTDOOR CLOTHING (for each person)
– Full gore-tex shell
– Full inner layer
– Spare socks
– Snow boots
– Insulated gloves (2 pair)
– Snow hat
– Ski goggles
– Day pack
– Water bottle
- BUTANE LIGHTER, visible reservoir without childproof lock
- STROBE, red, emergency signaling w/industrial ‘D’ cell battery
- ALUMINUM SNOW SHOVEL (2)
- CHAIN SAW, minimum 24” bar, w/ spare fuel and chain
- FOLDING SAW, portable
- SIGNALING MIRROR, Unbreakable
- FLASHLIGHT, LED (2)
- SHELTER TARP, polyethylene reinforced/grommeted 16’ by 20’
- SUNSCREEN, SPF 30 or better
- SIGNAL FLARE GUN, w/ 12 flares
- MEAL, READY TO EAT, Assorted Menu (6 Each)
- HI CALORIE DRINKS, powder (6 quarts)
- STOVE, portable camp
- POT, portable camp
- FLARES, 15 minute for fire starting and/or signaling (6)
- COMPASS, Lensatic
- REPAIR WIRE, four-spool stainless
- LOW TEMPERATURE BLACK TAPE, ¾” x 66’ Roll (2)
- SURVIVAL WHISTLE, Dual Chamber with Hypothermia Lip Guard
- LOW TEMPERATURE RED “100 MPH” TAPE, 2” x 20 Yards
- STORMPROOF MATCHES, With Sealed Striker (Box Of 25)
- SPACE BLANKETS, silver 54” x 84” (4 each)
- PARALINE CORD, 650#, 100 feet
- POLYETHYLENE BAG , orange, multiple use, 38” x 38” 2.5 Mil (6)
- AXE, one piece
- DUFFEL BAG, High Visibility
- HAND TOOLS
- SPARE PARTS BOX
- WELDER (underhood, Premier, with cables, hood, and tools)
Those anti-OHV people still monitor what happens on the Rubicon Trail. If you go during the winter, Tread Lightly! Cross country travel is only allowed by factory tracked vehicles. Don’t spin your tires as you transition from water crossings to snow. Winch more frequently than you think you should.
Let someone know where you are going and when you plan on returning. Carry all of the stuff listed above and more, like tools and spare parts. Never wheel alone or as a single vehicle.
And my personal favorite and this website’s motto: Turnaround, don’t go around.

